How to Fix a Golf Slice: Causes, Drills, and Simple Swing Changes

*We may earn a commission for purchases made using our links. Please see our disclosure to learn more.
Few shots in golf are as frustrating as a slice. You make what feels like a solid swing, only to watch the ball start toward the target and then curve sharply into the rough, or even the next fairway.
The good news is that a slice is not random. It comes from a predictable relationship between the direction your club is traveling and where the clubface is pointing at impact. Once you understand that relationship, fixing your slice becomes much easier than simply experimenting with different swing thoughts.
For a right-handed golfer, a slice curves significantly from left to right. For a left-handed golfer, everything discussed below works in reverse.
Modern launch-monitor data gives us a useful starting point. TrackMan defines face-to-path as the difference between the clubface angle and club path and identifies it as a key factor determining how the ball curves. When the face is open relative to the path for a right-handed golfer, the conditions are created for a shot that curves to the right.
That means the goal is not to somehow “force the ball left.” You need to improve the relationship between your clubface and swing path.
“The Face Sends It. The Path Bends It.”
— Titleist Learning Lab
Key Takeaways
- A golf slice occurs when the clubface is open relative to the swing path at impact.
- Many slicers combine an open clubface with an out-to-in swing path.
- Check your grip and clubface first before completely rebuilding your swing.
- Poor alignment, ball position, an over-the-top transition, and heel contact can all make a slice worse.
- Practice exaggerated draws and in-to-out swings to teach your body the opposite movement.
- Alignment sticks, grip trainers, connection aids, and swing-path trainers can provide useful feedback.
- Do not try to fix five swing faults simultaneously. Correct one variable, observe your ball flight, and progress from there.
Four Useful Training Aids for Fixing a Slice
Training aids cannot automatically repair your swing, but good ones provide feedback that is difficult to get from feel alone.
1. EyeLine Golf Speed Trap 2.0 — Best for Swing Path


The EyeLine Golf Speed Trap 2.0 is a swing training aid designed to help golfers improve club path, ball striking, and overall consistency. Its visual impact zone provides immediate feedback, making it easier to identify whether the club is approaching the ball from the correct direction or cutting across it, a common cause of slices and hooks.
- Immediate Feedback: Helps reveal incorrect swing paths and poor contact as soon as you make a swing.
- Slice Correction: Can encourage a more in-to-out path for golfers struggling with an over-the-top swing.
- Versatile Training: Works with different clubs and can also be used for full swings, chips, and pitch shots.
- Higher Price: Costs more than simple alignment sticks or basic swing-path training aids.
- Requires Setup: The guides need to be positioned correctly for the specific swing fault you are working on.
- Learning Curve: Beginners may need some instruction to understand how to configure and use it effectively.
The EyeLine Golf Speed Trap 2.0 uses adjustable foam rods to create visual and physical feedback around your club path.
For a slicer, you can arrange the rods to encourage the club to approach the ball from farther inside.
That makes it particularly useful for golfers who understand that they swing over the top but cannot feel what a different path should be like.
Golf Monthly’s 2026 testing praised the Speed Trap for providing immediate feedback on path and ball striking and specifically described using it to correct a push-slice pattern.
Best for: Chronic out-to-in swingers.
2. SKLZ Golf Grip Trainer — Best for Grip Fundamentals


The SKLZ Golf Grip Trainer is a compact training aid designed to help right-handed golfers develop more consistent hand positioning on the club. Its molded guide fits over a standard golf grip and shows where the fingers, thumbs, and palms should sit, making it easier to identify grip problems that can contribute to slices, hooks, and inconsistent ball striking.
- Grip Guidance: Molded positioning helps golfers place their hands more consistently on the club.
- Portable Design: Small and lightweight enough to keep in a golf bag for regular practice.
- Versatile Fit: Works with standard-sized grips on clubs ranging from drivers to wedges.
- Right-Handed Only: This version is designed specifically for right-handed golfers.
- Practice Aid Only: Intended for training rather than normal on-course play.
- Standard Grips: May not fit properly on oversized or unusually shaped golf grips.
The SKLZ Golf Grip Trainer attaches to a standard grip and provides molded reference points for hand placement.
This is especially useful if your slice begins with a weak or inconsistent grip.
Rather than repeatedly guessing whether your hands are correctly positioned, you can rehearse the same grip position.
Recent 2026 marketplace data shows it remains a popular golf training aid, while the product is specifically designed around repeatable hand positioning.
Best for: Right-handed golfers whose clubface tends to remain open.
3. Tour Striker Smart Ball — Best for Connection


The Tour Striker Smart Ball is a compact golf swing training aid designed to help golfers keep their arms and body working together throughout the swing. Placed between the forearms during practice, it encourages better connection through the takeaway, transition, impact, and follow-through while helping reduce excessive arm separation.
- Better Connection: Encourages the arms and torso to move together more consistently during the swing.
- Multi-Club Use: Suitable for practice with wedges, irons, woods, drivers, and short-game drills.
- Compact Design: Lightweight and easy to carry to the range or use during practice at home.
- Requires Practice: It may feel awkward initially while golfers adjust to keeping the ball in position.
- Not Slice-Specific: Improves connection and sequencing but does not directly correct every cause of a slice.
- Limited Feedback: Provides movement feedback but does not measure club path, face angle, or impact data.
The Tour Striker Smart Ball is designed to help golfers maintain better connection between the arms and body during the swing.
It sits between the forearms and encourages your arms, torso, and club to move together rather than allowing the trail elbow to separate excessively.
That can be helpful for golfers whose disconnected transition contributes to a steep, over-the-top downswing.
Best for: Golfers whose arms separate or trail elbow flies outward during transition.
4. Orange Whip Golf Swing Trainer — Best for Tempo


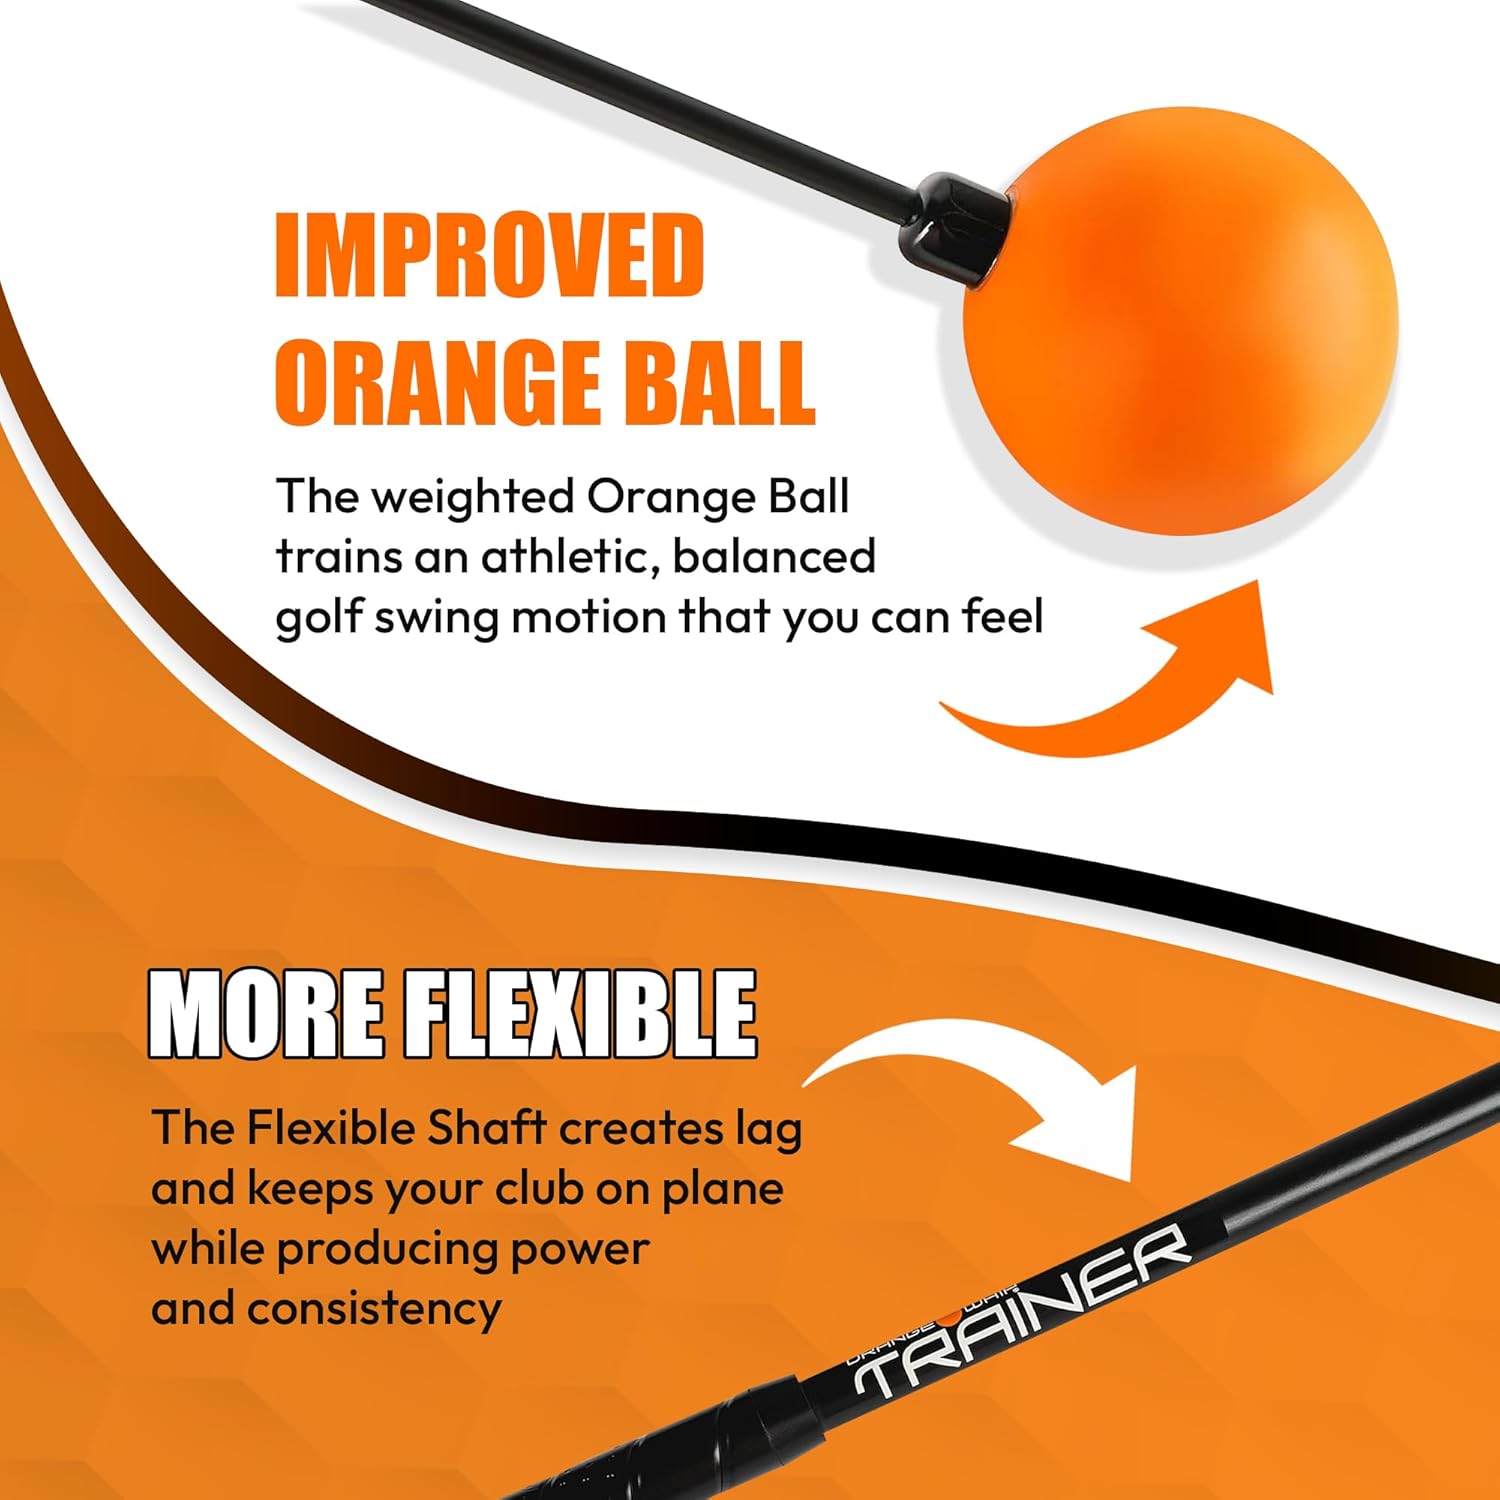
The Orange Whip Golf Swing Trainer is designed to help golfers improve tempo, balance, flexibility, coordination, and overall swing rhythm. Its flexible graphite shaft and patented counterbalanced design create noticeable feedback throughout the motion, making it easier to feel whether the swing is smooth and properly sequenced or rushed and off balance.
- Tempo Training: Flexible shaft encourages smoother rhythm and better sequencing throughout the swing.
- Instant Feedback: Wobbling or instability makes poor balance and tempo easier to recognize.
- Warm-Up Friendly: Weighted design can help improve flexibility and prepare the body before practice or play.
- Higher Price: More expensive than many basic swing trainers and tempo aids.
- Requires Space: The 47-inch full-size model needs sufficient room for safe practice.
- Not Slice-Specific: Improves rhythm and sequencing but does not directly correct clubface or swing-path problems.
The Orange Whip Golf Swing Trainer uses a flexible shaft and counterbalanced design to encourage rhythm, balance, and sequencing.
It is not specifically a “slice fixer,” which is important to understand.
Instead, it can help golfers whose slice becomes worse because they rush their transition and throw the club outward from the top.
Practicing smooth continuous swings can make it easier to feel the club loading and changing direction before accelerating through the hitting area.
The Orange Whip continues to be recommended by golf professionals as a practice and warm-up training tool.
Best for: Fast transitions, poor tempo, and sequencing problems.
What Causes a Slice in Golf?
The simplest explanation is that your clubface and club path do not match at impact.
Imagine that your clubhead is traveling five degrees left of the target as you strike the ball while your clubface is pointing only one degree left. Although the face is technically pointed left of the target, it is still open relative to the path.
That difference can tilt the ball’s spin axis and produce left-to-right curvature.
This distinction matters because many golfers assume a slice always means their clubface is pointed dramatically to the right. That is not necessarily true.
TrackMan explains that the ball curves toward the face angle and away from the club path when the face-to-path relationship is not zero.
Therefore, two golfers can hit slices that look similar but require different fixes.
One golfer may have:
- a severely out-to-in path,
- a nearly square clubface,
- and a large face-to-path difference.
Another may have:
- a reasonably neutral path,
- a very open clubface,
- and the same type of rightward curve.
Diagnosing your actual problem before changing your swing is essential.
Step 1: Watch Where Your Golf Ball Starts
Your ball flight provides valuable clues.
Do not look only at where the shot finishes. Pay attention to where it starts.
For a right-handed golfer:
| Ball Flight | Likely Issue |
|---|---|
| Starts left, curves right | Out-to-in path with face open to path |
| Starts straight, curves right | Face approximately square to target but open relative to path |
| Starts right, curves farther right | Open face, often combined with an unfavorable path |
| Starts left and stays left | Face relatively matched to an out-to-in path |
| Starts right and stays right | Face and path may be matched but directed right |
The exact numbers require launch-monitor measurement, but observing your start line and curve can help you determine what deserves attention first.
Step 2: Fix Your Golf Grip
Before rebuilding your backswing or downswing, inspect your grip.
PGA instruction identifies grip as one of the important fundamentals for slicers because a grip that makes it difficult to square the clubface can leave the face open at impact.
For a right-handed golfer, try this:
- Place the club diagonally through the fingers of your left hand rather than excessively through the palm.
- Close your hand around the grip.
- When you look down, you should generally be able to see some knuckles on your lead hand rather than having the hand rotated excessively underneath the grip.
- Place your trail hand comfortably over or around the lead thumb.
- Keep your grip pressure firm enough to control the club but not so tight that your wrists and forearms become rigid.
You do not need an extremely strong grip.
The objective is simply to put your hands in a position from which you can naturally return the face toward square.
Golf Digest instructor Robin Symes also recommends that slicers actually re-grip the club when making a grip change instead of simply twisting their hands while already holding it.
Practice Without Hitting Balls
Grip changes often feel uncomfortable at first.
Practice taking your grip 20 or 30 times at home. Repetition helps the new position start feeling normal before you introduce a full-speed swing.
Step 3: Check Your Alignment
Many golfers unknowingly make their slice worse before the club even starts moving.
A slicer sees the ball curve right and begins aiming farther left.
Unfortunately, aiming farther left can encourage the golfer to swing even farther left.
The result can be an increasingly severe out-to-in path.
Instead, place an alignment stick on the ground pointing toward your target. Place another parallel to it along your toe line.
Your:
- feet,
- knees,
- hips,
- and shoulders
should generally be coordinated with your intended target line rather than dramatically open to it.
Proper alignment gives you a neutral starting point from which you can actually evaluate your swing.
Step 4: Check Your Ball Position
Ball position can influence the clubface and path you deliver at impact.
PGA instruction specifically notes the importance of ball position when diagnosing a slice.
With the driver, position the ball roughly inside your lead heel rather than excessively forward or back.
For irons, move progressively closer to the center of your stance as the clubs become shorter.
Extreme ball positions often force compensations.
If the ball is too far forward, you may begin pulling your shoulders open early to reach it.
If it is dramatically too far back, you may contact it before the clubface has had an opportunity to square naturally.
Step 5: Fix an Open Clubface
For many slicers, clubface control should be addressed before aggressively changing swing path.
Golf Digest instructor Mark Blackburn summarizes this idea by describing the face as the “boss” and recommends learning to square it earlier rather than waiting until the final instant before impact.
Try the Knuckles-Down Feel
For a right-handed player:
- Make a normal backswing.
- Start your downswing slowly.
- Feel the knuckles of your lead hand beginning to point more toward the ground.
- Allow the lead wrist to become flatter rather than excessively cupped.
- Make several rehearsals without a ball.
Do not violently flip your wrists.
You are teaching the clubface to arrive in a better position earlier in the downswing so you do not have to save the shot with your hands at impact.
Start with half swings.
If the ball begins traveling left instead of slicing, that can actually be useful feedback. You may have successfully changed the face and can now work on your path.
Step 6: Stop Coming Over the Top
The classic slicer’s downswing often begins with the shoulders and upper body aggressively rotating toward the target.
That sends the club outward before it travels downward.
The club then approaches the ball from outside the target line and cuts across it.
Golf Digest notes that initiating the downswing with excessive upper-body rotation can throw the club onto an out-to-in path.
Instead, feel as though your lower body begins the transition while your upper body remains patient.
Your trail shoulder should move more down and toward the ball, not immediately out toward the target line.
Step 7: Practice an In-to-Out Swing Path
Trying to produce a draw is one of the most effective ways to learn the opposite movement of a slice.
You may need to exaggerate the feeling initially.
Imagine the ball is sitting in the center of a clock.
For a right-handed player:
- 12 o’clock points toward the target.
- Instead of swinging toward 10 or 11 o’clock, feel as though the club exits toward 1 or 2 o’clock.
You probably will not actually swing that far right.
The exaggerated intention helps neutralize an established out-to-in pattern.
The Headcover Drill
Place a headcover several inches outside and slightly behind the golf ball.
Now hit shots without contacting it.
An excessively outside approach will strike the headcover.
An improved path allows the club to approach the ball from farther inside.
PGA coaches also recommend drills that use obstacles or alignment sticks to give golfers immediate feedback about their swing path.
Step 8: Keep Your Trail Elbow Connected
Another helpful feeling is keeping your trail elbow closer to your side during the transition.
When the trail elbow flies outward, the club can move steeply above the ideal downswing plane.
Instead:
- Make a backswing.
- Begin down slowly.
- Feel your trail elbow moving toward your trail hip.
- Allow your hands to drop slightly before aggressively rotating through the shot.
Do not pin the elbow against your body.
You simply want to prevent it from immediately flying outward.
PGA instruction similarly recommends bringing the trail elbow closer to the trail side when working to correct an out-to-in path.
Step 9: Improve Your Swing Sequence
Some golfers have reasonable mechanics but destroy them by rushing from the top.
When the transition becomes too fast, the shoulders can take over before the arms and club have time to shallow.
Try counting:
One — backswing.
Two — transition.
Three — through the ball.
Another useful drill is making continuous back-and-forth swings without a ball.
The goal is not to swing slowly forever. It is to develop a sequence in which speed builds naturally rather than being dumped into the first few inches of the downswing.
Step 10: Check Where You Strike the Clubface
Swing path and face angle are not the entire story, especially with a driver.
Strike location also matters.
Repeated heel contact can contribute to undesirable curvature because of the gear effect created when the ball is struck away from the center of the driver face.
Use impact spray, foot powder, or impact tape to identify your strike pattern.
If most shots are coming from the heel, try:
- standing fractionally farther from the ball,
- improving balance,
- avoiding excessive movement toward the ball during the downswing,
- or placing a tee just outside the ball and practicing missing it.
Your first goal should be consistently finding the center of the face.
A Simple Slice-Fixing Range Routine
Avoid standing on the range and hitting 100 drivers as hard as possible.
Use structured practice instead.
Balls 1–10: Grip and Setup
Hit short irons at approximately 50 percent speed.
Focus only on:
- grip,
- alignment,
- posture,
- and centered contact.
Ignore distance.
Balls 11–20: Clubface Control
Hit half swings while exaggerating the feeling of closing the clubface.
Your goal is actually to make some balls curve left.
If you are a lifelong slicer, seeing a hook can be progress because it proves you are learning to influence the face.
Balls 21–30: Swing Path
Use a headcover or alignment-stick drill.
Attempt to send the ball slightly right of the target before allowing it to curve back.
Balls 31–40: Combine Face and Path
Move toward three-quarter swings.
Try producing small draws rather than dramatic hooks.
Balls 41–50: Driver
Only after you can change the flight of shorter clubs should you move to the driver.
Begin at approximately 70 percent speed.
Prioritize:
- center contact,
- face control,
- path,
- then speed.
Why Does My Driver Slice More Than My Irons?
A driver exaggerates certain swing problems because it is longer, has less loft, and is generally swung faster.
The longer shaft makes face control more demanding, while the lower loft makes horizontal curvature more noticeable.
Golfers also tend to swing considerably harder with a driver.
The moment they decide to “hit it hard,” their shoulders may rush forward and send the club outside the ideal path.
If your irons are relatively straight but your driver slices badly, first check:
- tee height,
- ball position,
- strike location,
- alignment,
- and whether you are dramatically increasing effort.
Try hitting drivers at 70–80 percent speed.
If the slice disappears, your mechanics may not be fundamentally broken. Your sequencing could simply deteriorate when you chase maximum distance.
Do Not Try to Fix Everything at Once
This may be the most important practice principle in this guide.
Golfers often discover that they:
- have a weak grip,
- aim left,
- swing over the top,
- leave the face open,
- and hit the heel.
Then they attempt to correct all five problems during the next swing.
That rarely works.
Instead, establish priorities.
A sensible order is:
1. Grip
2. Alignment and ball position
3. Clubface
4. Swing path
5. Strike location
6. Speed
Hit enough shots after each adjustment to identify how your ball flight changes.
The ball provides feedback.
A pull after years of slicing, for example, may indicate that the clubface has become much better but the path is still moving left.
That means you should not immediately undo the face correction.
Move on to the path.
When Should You Get a Golf Lesson?
Self-practice works when you can identify your dominant mistake and make measurable progress.
But if your slice persists after several structured range sessions, professional instruction can save considerable time.
A PGA professional with access to a launch monitor can measure:
- club path,
- face angle,
- face-to-path,
- strike location,
- attack angle,
- launch,
- and spin.
That removes much of the guesswork.
You may discover that the swing fault you have spent months trying to correct is not actually the primary cause.
PGA instruction also recommends working with a professional when golfers need help determining how equipment, setup, clubface, and swing path interact.
The Bottom Line
Learning how to fix a golf slice begins with understanding why the ball curves.
For a right-handed golfer, the fundamental problem is a clubface that is open relative to the club’s path at impact. An out-to-in path commonly makes that relationship worse, but the path alone is not enough to diagnose every slice.
Start with the simple things.
Check your grip. Confirm your alignment and ball position. Learn to control the clubface. Then work on delivering the club from a less out-to-in direction.
Practice slowly enough that you can actually change the movement.
You do not need a perfect golf swing to eliminate a slice. You need a clubface and path that work together predictably.
Once you can intentionally hit a ball that curves left, right, or flies relatively straight, you are no longer simply hoping the slice disappears. You are beginning to control your ball flight.
Frequently Asked Questions
1. What is the fastest way to fix a golf slice?
Start by checking your grip and clubface rather than immediately rebuilding your entire swing. Make half swings while learning to square or slightly close the face relative to your path. Once you can prevent the face from remaining open, begin correcting an excessive out-to-in swing path.
2. Does a strong grip fix a slice?
A slightly stronger grip can help some golfers square the clubface more naturally, particularly if their current grip is excessively weak. However, an extreme grip is not a universal solution. If your main problem is a severely out-to-in swing path, changing the grip alone may simply turn your slice into a pull.
3. Why do I slice my driver but not my irons?
Drivers are longer, lower lofted, and typically swung faster than irons. Those characteristics can make face-control and swing-path errors more noticeable. Golfers also tend to become more aggressive with the driver, which can trigger an over-the-top transition. Check your ball position, strike location, alignment, and tempo before making a major swing change.
4. Can an out-to-in swing cause a slice?
An out-to-in path can contribute strongly to a slice, but curvature depends on the relationship between the clubface and path. If the face is open relative to an out-to-in path, the ball can curve significantly to the right for a right-handed golfer. TrackMan identifies this face-to-path relationship as a key determinant of shot curvature.
5. How long does it take to fix a golf slice?
There is no fixed timeline. A setup or grip problem can sometimes produce noticeable improvement during a single practice session, while changing an established downswing pattern may take weeks or longer. Consistent, focused practice is more valuable than hitting hundreds of balls without feedback. If progress stalls, a lesson with a qualified golf professional can help identify the specific cause.